Tagged: night

Death Valley November 2012 Photo Trip

Earlier this month I again went out to what has become a favorite location for photography of mine – Death Valley National Park. The goal was to once again work on low-light, night and long exposure techniques for the most part at night and do fun exploring and typical dawn, dusk and HDR work during the day.

The technique I was most focused on this time was exposure stacking, which is a Photoshop technique where a series of short-ish long exposures of the night sky are layered together to achieve the same visual effect as a single long exposure. The image below is the most successful example I have from the trip; a mesquite bush on a sand dune with a series of 60 20-second-long exposures to give a total exposure effect of 20 minutes. The mesquite bush was lit for a few minutes with a hand-held flashlight using a painting-with-light technique.
A Moonlit Scene Looking West to the Panamint Range from Death Valley National Park’s Harmony Borax Works site

The stacking technique is superior to the single long exposure technique for me now for several reasons. First, the sky stays black since the 20 seconds at f4.5 and ISO 100 exposure used in this case is not enough to lighten the sky. Second, sensor noise does not build to a detectable degree with a 20 or 30 second exposure. I believe my workhorse Canon 40D may be getting “old” because it seems that longer (multi-minute) exposures are much noisier now than they were even 2 years ago.

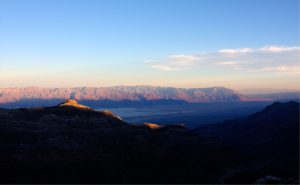
This next photo is a late afternoon 3-image HDR shot looking east across the valley at the Amargosa Range from 6400 ft (2000 m) high Aguereberry Point in the Funeral Range very near Telescope Peak. This was a 6 mile improved gravel road drive that my 2005 Camry was able to do, much to my surprise and delight. I arrived at the overlook about an hour or so before the sun dropped below the Sierras and Panamint Ranges and I was able to get a few panoramas and HDRs of the views.
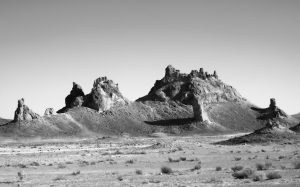
Another site visited was Trona Pinnacles, which I visited on the drive out to the park. Trona Pinnacles is in the California Desert National Conservation Area and is an unusual set of tufa formations. They have been the site of many film and advertising shoots and are unusual looking. They were formed from between 10 000 and 100 000 years ago, when the area was a large Pleistocene Era lake.
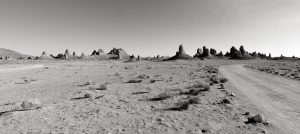
A multiple image panorama of the Tronas Pinnacles

A three image HDR photo of the Tronas Pinnacles in Tronas, CA


I have an album of photos from this Death Valley trip in my photo gallery immediately next to the Anza Borrego night sky photo.


Joshua Tree National Park Full Moon Photography

This weekend was a lunar perigee full moon. These don’t happen all that much together; perigee is the moon’s closest point to Earth in its orbit so the net result is an ever so slightly larger and therefore brighter moon. I decided to take advantage of this situation by driving to Joshua Tree National Park, a roughly 3 hour trek. I left the house around 12:30 PM and arrived at the Visitor’s Center at the northern edge of the park at 3:00 PM. A quick discussion with a ranger, a purchased entrance fee and off I went into the park. I ended up driving on the Geology Tour Rd and Queen Valley Rd (both unimproved) before deciding on hanging out along a stretch of Geology Tour Rd. The ranger assured me that area would very dark and pretty much devoid of people.

I stopped at the very southern corner of Geology Tour Rd and shot this panorama looking north of Pleasant Valley.

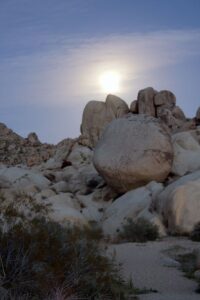
I found a good turn-off next to the road and set up. The moon rose above the rock formations and I took this image.

The full moon is behind a cloud. This was an ominous beginning; the clouds were coming in from the coast in front of the rain storm that hit us the next day. The clouds cut down the light available and made exposure estimation that much harder.

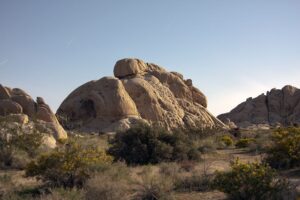
This was a multiple-minute exposure of a granite rock outcropping just off the road.

Eventually the clouds became so heavy I had to abandon the activity; the light was less than half what it was at the beginning of the evening.

Lessons learned:

1. Bring extra batteries. I went through a double battery pack in 3 hours of shooting. The long exposures really drain the batteries.
2. Next time I’ll get a hotel room out there and work all night instead of feeling like I had to get done by a certain time so I could safely drive home.
3. Give more time for location scouting.
4. Improve my autofocus management technique.


If you are planning a visit to Italy soon I have written 2 walking tour guide books to Rome that you can purchase here or at Amazon or Barnes and Noble.

I have an album of photos from Joshua Tree National Park in my photo gallery.


Night Sky Photography

Night sky photography requires some specific equipment and techniques.

  • You must have a tripod because whether you are shooting digital or film you will be exposing the image for very long periods (in photography a long period is pretty much anything over half a second).
  • You must have a camera that is able to have long exposure times.
  • You must be able to control the lens opening (the “f-stop” or “aperture”).
  • You must have a wide-angle setting for the focal length.
  • You must have a very high ISO film or be able to set the ISO on your digital camera to something like 800 or 1600.
  • (Optional) If your camera has a built-in automatic noise processing function you must be able to turn it off

The reason for all of this is to capture as much light as possible without having the stars turn into fuzzy blobs. With the settings I’ve described above you’ll get a lot of light into the camera and still have pin-point stars. Anything over 30 seconds or if you zoom in to telephoto you’ll start to see star streaks/blobs since the Earth is spinning the whole time, making the star field traverse across the sky.

This night sky image of the stars above Anza Borrego Desert State Park was taken with my Canon 40D with my EF 24 – 105 mm f/4 L IS USM lens. The lens was set to f5, the exposure was 20 seconds (the 40D has a maximum exposure time of 30 seconds, exposure times higher than that must be executed in Bulb mode). The f-stop is slightly smaller than full open in order to reduce/remove distortions caused by the very edge of the lens optics. An f/5.0 setting “chops off” the light at the very edge and sharpens the image at the expense of losing a little bit of light.

Night sky image with star streaks Anza Borrego

If you want to take those super-cool pictures that show the stars as long circular streaks then you are looking at very long exposures – 30 minutes or an hour or even more. In that case you can adjust some of the other parameters so that the overall amount of light entering the camera is less per second. The stars themselves are bright points and get detected OK anyway.

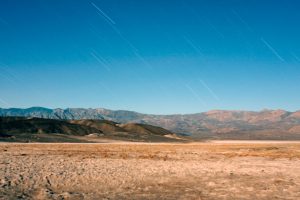
This image of streaking stars above Death Valley is about 30 minutes long at f5 with an ISO of 400. A higher ISO in this case records too much background light in the sky.

Night sky long exposure star trails Death valley

Exposures like this are where film cameras still shine since in many upper-end digital cameras long exposures will trigger the camera’s built-in noise reduction algorithm which requires as long a time to process as the exposure, so a 30 second exposure requires 30 seconds more of processing, so an hour exposure is a two hour total process. You can get twice as many exposures (or be done in half the time) than with a digital camera in those circumstances. If you can turn off the in-camera noise processing you should consider doing so. Photoshop CS3 RAW processing has a noise reduction feature included as way to reduce or eliminate noise artifacts from long exposure images.


I have several photo galleries featuring images of California, the US Southwest, Europe (Germany, Austria and Italy) and Asia (Japan, Taiwan, Hong Kong and China) at my Photoshelter galleries site.